

As a cloud consulting company, we’ve seen our share of AWS bills. But when our client forwarded us their monthly statement with a concerned email, even we were surprised.
$3,247 for the month.
The breakdown was what really caught our attention:
- Production: $1,400
- Development & Staging: $1,847
They were literally spending more on building the product than running it in production.
The client, a fast-growing SaaS company, had approached us to optimize their AWS costs. We expected to find inefficiencies in production environments—oversized instances, unused resources, that sort of thing. Instead, we discovered something completely different.
Development was the real problem
Six months earlier, the team had just 3 developers, a serverless AWS architecture, and manageable cloud bills. Nothing unusual. Then the team grew to 8 developers, and things got expensive fast.
After a junior developer accidentally deleted a shared AWS resource (we’ve all been there), the team made what seemed like a reasonable decision: “Each developer should have their own AWS environment.”
In practice, this meant:
- 8 developers meant 8 full AWS stacks running 24/7.
- Duplicated Lambda functions, DynamoDB tables, S3 buckets across all environments.
- $780 per month just for developer environments.
To their credit, they followed AWS best practices almost perfectly. Integration tests on every pull request, temporary AWS environments spun up per PR, tests running against real AWS services.
Their monthly CI/CD costs:
- ECS Fargate containers: $300
- RDS test databases: $60
- CloudFormation operations: $80
- Data transfer: $42
- Miscellaneous charges: $42
- Total: $524 per month.
Like most growing teams, they also had the usual suspects: EC2 instances left running after tests, an Elasticsearch domain from “that one experiment” three months ago, orphaned load balancers nobody remembered creating. Quietly adding another $145 per month.
The productivity hit was worse than the costs
We shadowed the team for a day to understand their workflow. Here’s what a typical bug-fix cycle looked like:
- Write code (3 minutes)
- Deploy to AWS (3 minutes)
- Wait for deployment (5+ minutes)
- Test (2 minute)
- Check CloudWatch logs (1 minute)
- Find another issue
- Repeat 5-8 times per bug
Developers spent roughly 60% of their time just waiting. The irony wasn’t lost on us. The cloud was meant to accelerate development, but it was actually slowing them down.
Every meaningful change required a pull request. Every pull request required review. Every review took time. While waiting, AWS resources kept running, test executions kept consuming credits, and repeated experiments became expensive.
As experimentation increased, so did the friction:
- Spinning up AWS resources for every test iteration.
- Paying for services even when nothing productive was happening.
- Slow feedback loops while waiting for cloud deployments.
- Risk of breaking shared dev environments.
- Reluctance to experiment freely because cleanup was never trivial.
There was no local debugging. Period. So developers relied on console.log() driven development. Deploy, wait, check logs, repeat. 30-60 second delays before logs appeared in CloudWatch. No breakpoints, no variable inspection, no stepping through code.
"I spend more time waiting for deployments than actually coding." — Senior Engineer
Enter LocalStack
While reviewing their infrastructure, we evaluated several local AWS emulation options and landed on LocalStack. It sounded too good to be true: a complete AWS-like environment running locally.
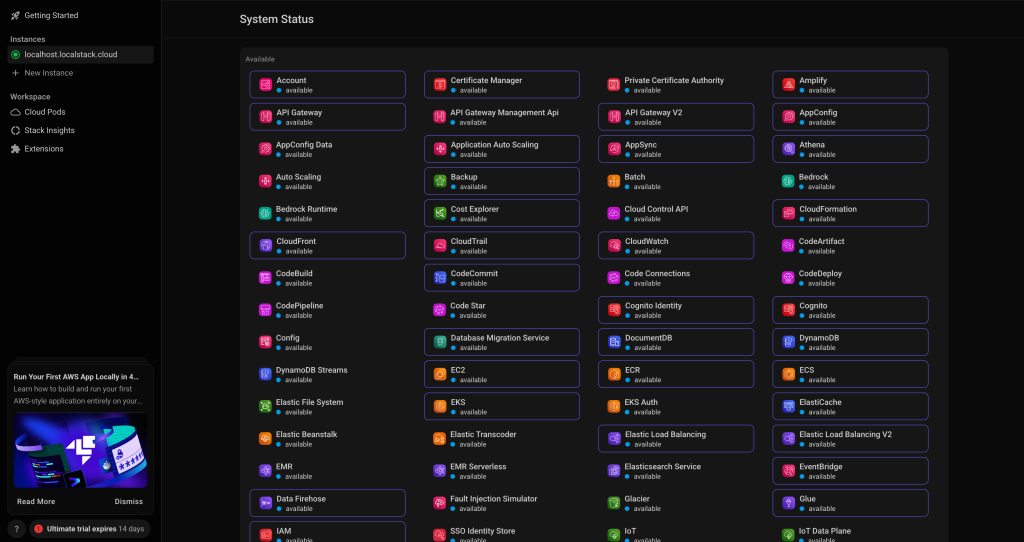
LocalStack is a local cloud emulator that runs in a Docker container on your machine. From the application’s point of view, nothing changes: Same AWS SDKs, same CLI commands, same APIs, and same infrastructure patterns. The only difference is the endpoint URL.
From here, you have options on how to get started, diving deeper into using LocalStack, and so on.
Select the My License option on the sidebar. It should reveal the following:

For this demo, we will stick with the free-trial version, but feel free to select and read about others if you like.
After selecting the free-trial option, you will need to fill out the remaining personal information to proceed. Once all that is complete, navigate back to the dashboard and select the Auth Tokens selection on the sidebar.
It should reveal the following:

This page generates a personal authentication token for you. You also have the option of resetting it anytime for security reasons.
You will need to add this as an environment variable locally in order to work with the LocalStack API.
Head over to the terminal and paste in the command as is:

Whenever we make calls using the CLI, we are in fact, making an API call to LocalStack behind the scenes and we will be authenticated using this token.
Your freedom of calls depends on your subscription (free-trial/paid). For more advanced features, you will need a paid subscription.
This concludes setting up the LocalStack account. Now, it is on with local installation.
Why This Changed Everything
Once we integrated LocalStack into our workflow, the impact was immediate and measurable.
- Task processing became nearly 60% faster
- Infrastructure spin-up time dropped to seconds
- AWS costs during development were almost eliminated
- Developers experimented more freely
- PR review cycles shortened because issues were caught earlier
Most importantly, feedback became instant.

How it actually works
LocalStack runs as a single Docker container exposing AWS-style endpoints, typically on http://localhost:4566.
- The request hits LocalStack instead of AWS.
- LocalStack routes it to the correct service emulator.
- The emulator processes the request.
- A response identical to AWS is returned.
State is preserved. If you create an S3 bucket, it exists until you delete it. You can even configure persistence so the state survives container restarts.
The networking piece
LocalStack emulates AWS networking components (VPCs, subnets, route tables) at the API and state level. This allows developers to validate networking architecture and IAM policies without provisioning real VPC networking.
Example Terraform validation:
Terraform
resource "aws_vpc" "main" {
  cidr_block = "10.0.0.0/16"
  tags = {
    Name = "local-vpc"
  }
}

resource "aws_subnet" "public" {
  vpc_id     = aws_vpc.main.id
  cidr_block = "10.0.1.0/24"
  tags = {
    Name = "public-subnet"
  }
}

resource "aws_security_group" "web_sg" {
  name   = "web-sg"
  vpc_id = aws_vpc.main.id
  ingress {
    from_port   = 80
    to_port     = 80
    protocol    = "tcp"
    cidr_blocks = ["0.0.0.0/0"]
  }
}
What LocalStack can’t do
Networking constructs are simulated rather than enforced at the packet level. It is not suitable for:
- Performance benchmarking.
- Latency-sensitive networking tests.
- Validating real traffic flow between isolated subnets.
- Load testing at scale.
In practice, LocalStack excels at IaC validation, CI/CD testing, IAM policy verification, and catching configuration errors early.
Building a Serverless App with LocalStack ( Demo)
Installing LocalStack
pip install localstack
pip install awscli-local
Starting LocalStack
localstack start -d
localstack status
Testing LocalStack
# Set up environment variables
export AWS_ACCESS_KEY_ID=test
export AWS_SECRET_ACCESS_KEY=test
export AWS_DEFAULT_REGION=us-east-1

# Create and list an S3 bucket
awslocal s3 mb s3://my-test-bucket
awslocal s3 ls

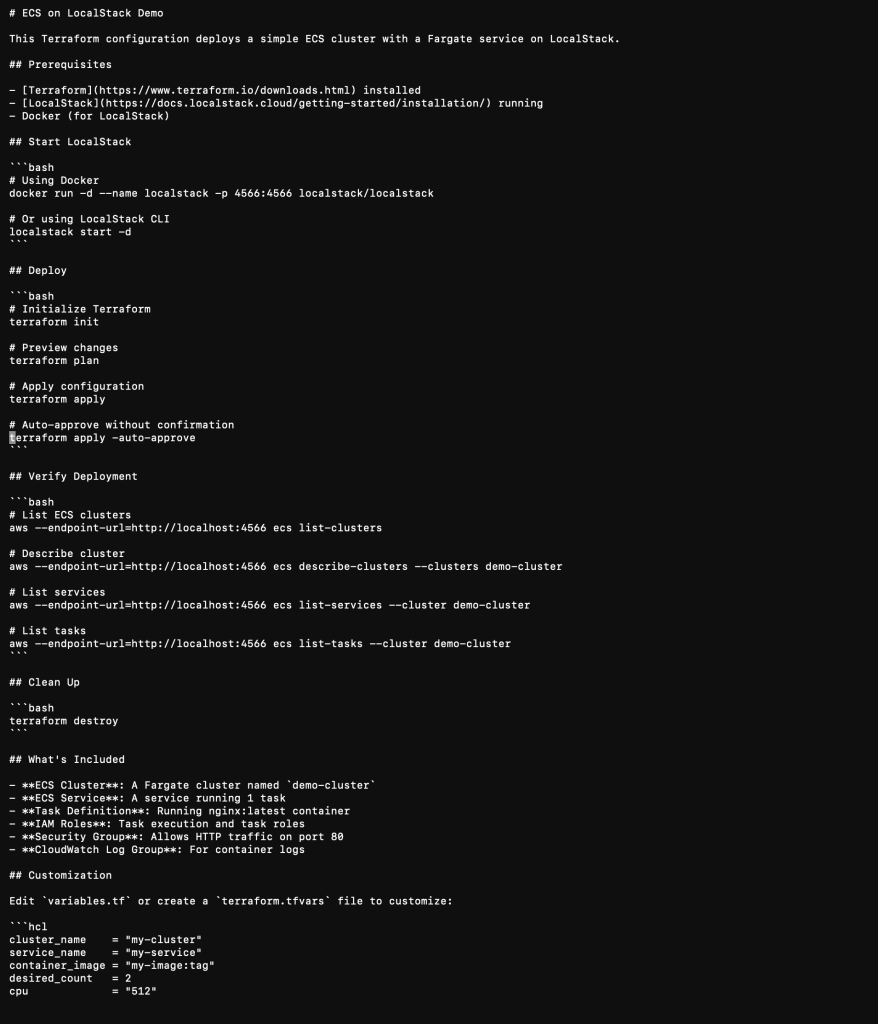
Step 1: ECS on LocalStack Demo
terraform {
  required_providers {
    aws = {
      source  = "hashicorp/aws"
      version = "~> 5.0"
    }
  }
}

provider "aws" {
  access_key                  = "test"
  secret_key                  = "test"
  region                      = "us-east-1"
  skip_credentials_validation = true
  skip_metadata_api_check     = true
  skip_requesting_account_id  = true

  endpoints {
    ec2 = "http://localhost:4566"
    ecs = "http://localhost:4566"
    ecr = "http://localhost:4566"
    iam = "http://localhost:4566"
    logs = "http://localhost:4566"
  }
}
Step 2: Create main.tf
# ECS Cluster
resource "aws_ecs_cluster" "demo_cluster" {
  name = "demo-cluster"

  tags = {
    Environment = "demo"
    ManagedBy   = "terraform"
  }
}

# IAM Role for ECS Task Execution
resource "aws_iam_role" "ecs_task_execution_role" {
  name = "ecs-task-execution-role"

  assume_role_policy = jsonencode({
    Version = "2012-10-17"
    Statement = [
      {
        Action = "sts:AssumeRole"
        Effect = "Allow"
        Principal = {
          Service = "ecs-tasks.amazonaws.com"
        }
      }
    ]
  })
}

# IAM Role for ECS Task
resource "aws_iam_role" "ecs_task_role" {
  name = "ecs-task-role"

  assume_role_policy = jsonencode({
    Version = "2012-10-17"
    Statement = [
      {
        Action = "sts:AssumeRole"
        Effect = "Allow"
        Principal = {
          Service = "ecs-tasks.amazonaws.com"
        }
      }
    ]
  })
}

# CloudWatch Log Group
resource "aws_cloudwatch_log_group" "ecs_logs" {
  name              = "/ecs/demo-app"
  retention_in_days = 7
}

# ECS Task Definition
resource "aws_ecs_task_definition" "demo_task" {
  family                   = "demo-task"
  network_mode             = "awsvpc"
  requires_compatibilities = ["FARGATE"]
  cpu                      = "256"
  memory                   = "512"
  execution_role_arn       = aws_iam_role.ecs_task_execution_role.arn
  task_role_arn            = aws_iam_role.ecs_task_role.arn

  container_definitions = jsonencode([
    {
      name      = "demo-container"
      image     = "nginx:latest"
      essential = true

      portMappings = [
        {
          containerPort = 80
          hostPort      = 80
          protocol      = "tcp"
        }
      ]

      logConfiguration = {
        logDriver = "awslogs"
        options = {
          "awslogs-group"         = aws_cloudwatch_log_group.ecs_logs.name
          "awslogs-region"        = "us-east-1"
          "awslogs-stream-prefix" = "demo"
        }
      }

      environment = [
        {
          name  = "ENV"
          value = "demo"
        }
      ]
    }
  ])
}

# Default VPC (LocalStack creates this automatically)
data "aws_vpc" "default" {
  default = true
}

data "aws_subnets" "default" {
  filter {
    name   = "vpc-id"
    values = [data.aws_vpc.default.id]
  }
}

# Security Group
resource "aws_security_group" "ecs_tasks" {
  name        = "ecs-tasks-sg"
  description = "Allow inbound traffic for ECS tasks"
  vpc_id      = data.aws_vpc.default.id

  ingress {
    from_port   = 80
    to_port     = 80
    protocol    = "tcp"
    cidr_blocks = ["0.0.0.0/0"]
  }

  egress {
    from_port   = 0
    to_port     = 0
    protocol    = "-1"
    cidr_blocks = ["0.0.0.0/0"]
  }

  tags = {
    Name = "ecs-tasks-sg"
  }
}

# ECS Service
resource "aws_ecs_service" "demo_service" {
  name            = "demo-service"
  cluster         = aws_ecs_cluster.demo_cluster.id
  task_definition = aws_ecs_task_definition.demo_task.arn
  desired_count   = 1
  launch_type     = "FARGATE"

  network_configuration {
    subnets          = data.aws_subnets.default.ids
    security_groups  = [aws_security_group.ecs_tasks.id]
    assign_public_ip = true
  }

  tags = {
    Environment = "demo"
  }
}
Step 3: Create outputs.tf
output "cluster_name" {
  description = "Name of the ECS cluster"
  value       = aws_ecs_cluster.demo_cluster.name
}

output "cluster_arn" {
  description = "ARN of the ECS cluster"
  value       = aws_ecs_cluster.demo_cluster.arn
}

output "service_name" {
  description = "Name of the ECS service"
  value       = aws_ecs_service.demo_service.name
}

output "task_definition_arn" {
  description = "ARN of the task definition"
  value       = aws_ecs_task_definition.demo_task.arn
}

output "security_group_id" {
  description = "ID of the security group"
  value       = aws_security_group.ecs_tasks.id
}
Step 4: Deploy and Test
terraform init
terraform plan
terraform apply -auto-approve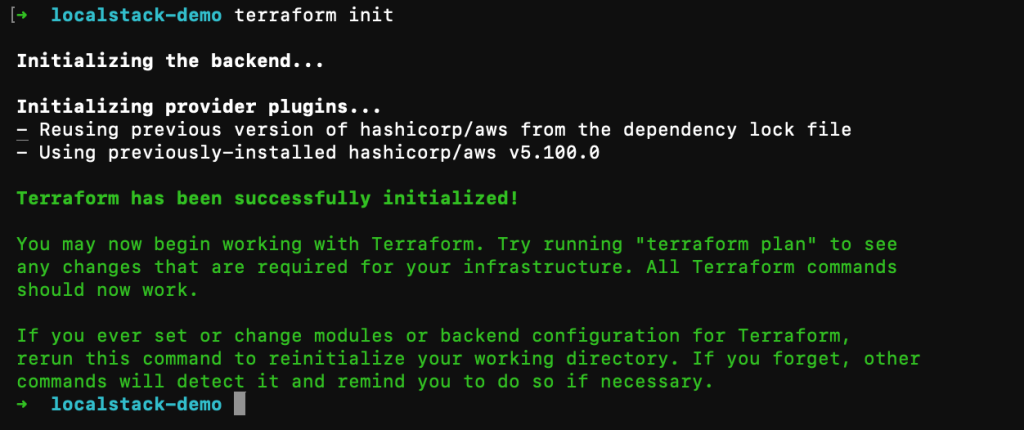


Three Months Later: The Numbers
Cost reduction: 70%
- Before: $1,847 per month
- After: $550 per month (LocalStack Base licenses + minimal shared AWS staging)
- Annual savings: $15,600
Development speed: 5× faster feedback
- Bug fixes: 62% faster
- Feature delivery: 33% faster
- Deploy/test cycle: 54× faster
- Features shipped per sprint: up 50%
Quality improvements
- Bugs caught before production: jumped from 77% to 94%
- Production incidents: down 40%
- Bug-related support tickets: down 35%
Time saved
Roughly 300 developer hours saved per month, or about $18,000 per month in reclaimed productivity.
Challenges and Solutions
- Service parity? LocalStack Pro and a minimal staging environment for edge cases.
- High memory? Enable only needed services (e.g.,
export SERVICES=s3,lambda). Allocate 4GB RAM to Docker. - Accidental AWS calls? Use
.env.localdefaults. - Resources not found? Ensure
export AWS_DEFAULT_REGION=us-east-1is set. - Won’t start? Run
docker psto check port 4566.
Essential Commands & Best Practices
Daily Management:
localstack start -d/localstack stoplocalstack logsawslocal s3 ls/awslocal lambda list-functions
Best Practices:
- Multi-environment code: Use dynamic blocks in Terraform to toggle LocalStack endpoints.
- Persistence: Always use
PERSISTENCE=1and volumes. - Staging environment: Keep a real AWS staging for final integration checks.
The Verdict: When this makes sense
Ideal for:
- 3+ developers on AWS infra.
- Serverless or microservices architecture.
- AWS dev costs over $500/month.
- Integration tests in CI/CD.
Not ideal for:
- Very small teams (1-2 devs).
- Highly specialized AWS workloads not yet supported.
Looking Back
We went looking for cost optimizations. What we found instead was a broken development workflow. LocalStack didn’t just reduce costs—it fundamentally changed how the team worked.
Start today. Install LocalStack. Build something. Break it. Fix it. Learn. All without spending a cent on AWS infrastructure.
Resources: